OCRR Basics
This section covers the fundamentals of using OCRR's capabilities to extract text from your documents.
Processing a Document
OCR (Optical Character Recognition) is the process of converting images of text into editable, searchable text data.
- Open a PDF or image document using the "Open Image..." button in the bottom controls area, use File → Open from the menu bar (keyboard shortcut: ⌘O), or drag and drop a file onto the application.
- Once your document is loaded, click the "Show OCR Layer" button at the bottom of the window.
- OCRR will process the document and display the recognized text overlaid on the original image.
- You can now edit the recognized text or save the document with an invisible OCR text layer embedded.
- Alternatively, you can skip showing the OCR layer and directly click the "Save PDF" button to get an output PDF file with embedded text.
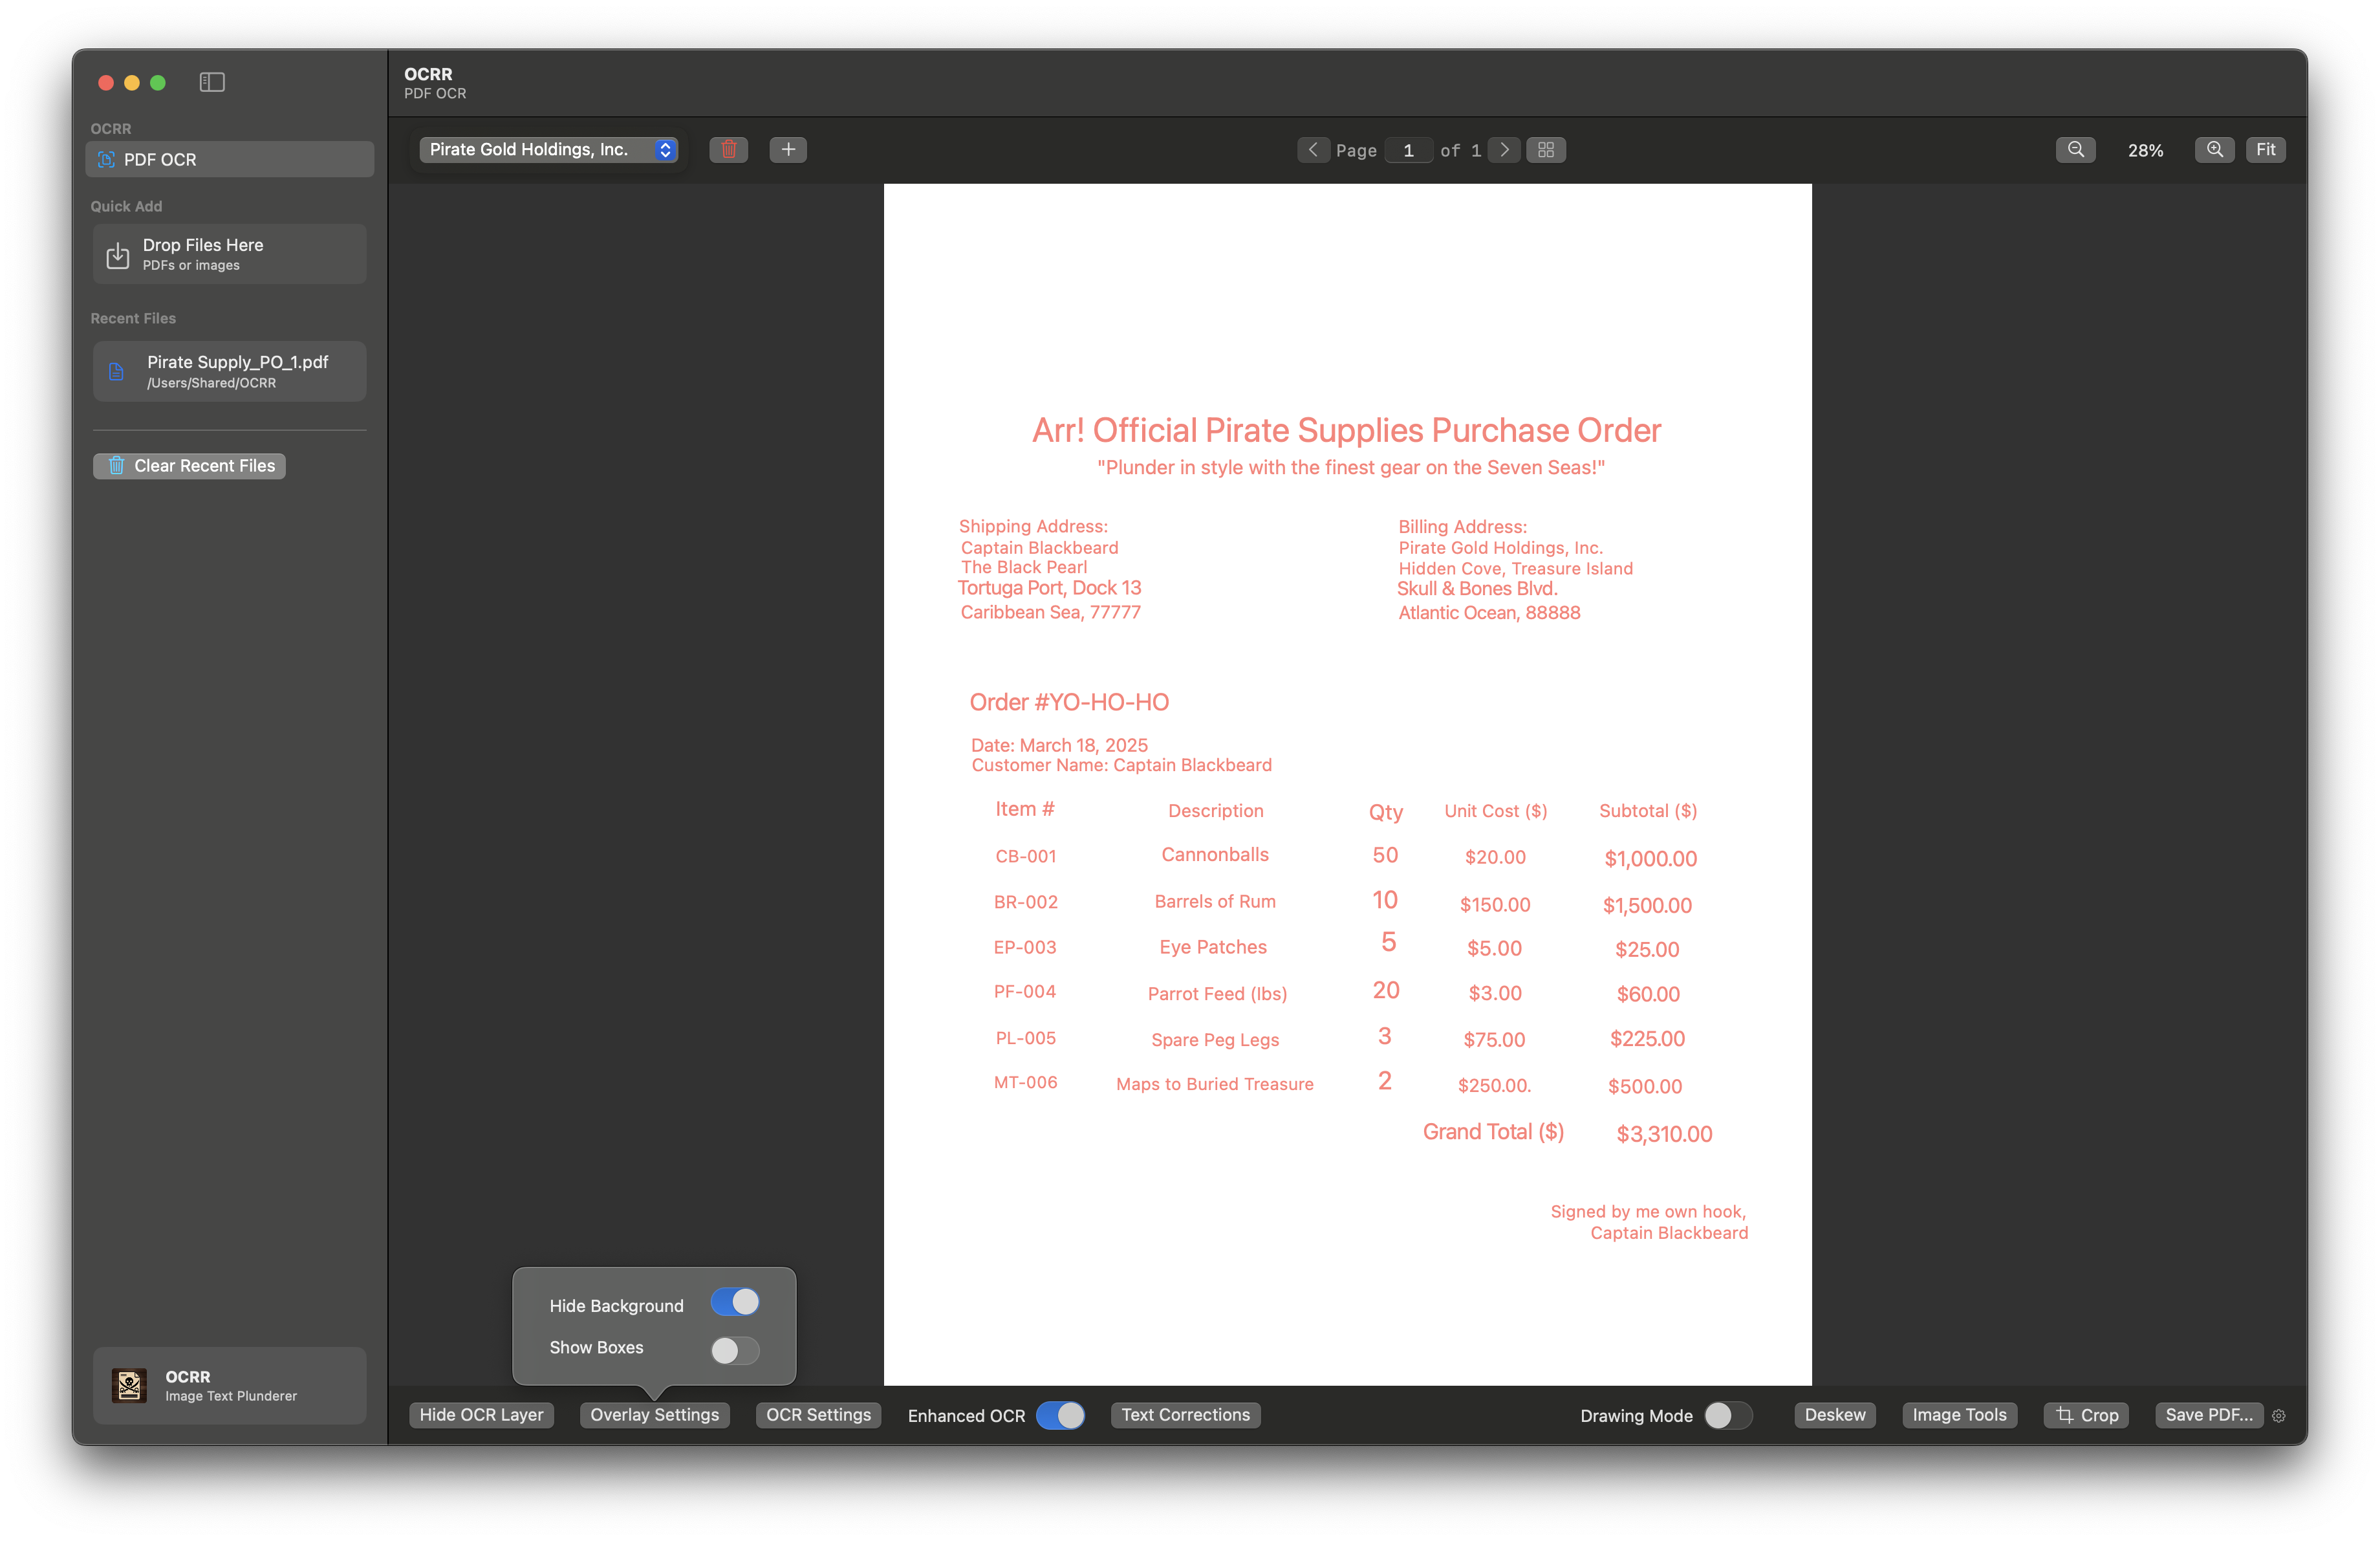 Document with OCR text overlay active
OCR Settings
OCRR offers several settings to customize the OCR process for optimal results:
Accessing OCR Settings
Click the "OCR Settings" button in the bottom control panel to open the settings dialog.
Recognition Settings
- Minimum Text Height: Sets the smallest text size to detect, as a percentage of image height. Smaller values catch more text but may increase false positives. Set to 0 to detect text of any size.
- Fast Recognition Mode: Processes quicker but may miss some text. When disabled, the accurate mode is slower but more thorough and reliable.
- Language Correction: Attempts to correct minor recognition errors using selected language rules. May improve accuracy for standard text but could interfere with special terms or codes.
- Enhanced OCR: Performs additional processing to catch stray characters. This process may take significantly longer but should improve accuracy and catch any text that would otherwise be missed.
Languages
OCRR supports multiple languages for OCR processing. Select one or more languages that match the content of your document for best results:
- English (US and UK)
- Spanish (Spain and Mexico)
- French (France and Canada)
- German
- Italian
- Portuguese (Portugal and Brazil)
- Chinese (Simplified and Traditional)
- Japanese
- Korean
Tip: For multilingual documents, add all relevant languages to improve recognition accuracy.
Deskew Features
OCRR includes automatic deskew capabilities to improve OCR accuracy for documents that aren't perfectly aligned. The program offers two different deskew modes that you can choose from:
Deskew Modes
- Expand Canvas Mode: This mode preserves the content at its original size but may change the document dimensions to accommodate the rotated content. The canvas expands to fit the rotated content, which can result in a larger document size.
- Keep Canvas Size Mode: This mode maintains the original document dimensions but may scale the content slightly to fit within the original bounds. The content is rotated and scaled to fit within the original canvas size, ensuring consistent document dimensions.
Tip: Choose "Expand Canvas" when preserving the exact size of content is more important than maintaining the original document dimensions. Choose "Keep Canvas Size" when you need consistent document dimensions across all pages.
Using Deskew
To apply deskew to your document:
- Open your document in OCRR.
- Click the "Deskew" button in the bottom control panel.
- In the deskew settings popover, select your preferred deskew mode.
- Click "Apply Deskew" to correct the current page, or "Apply to All Pages" to correct all pages in the document.
Note: OCRR automatically detects the skew angle in your document and applies the appropriate correction.
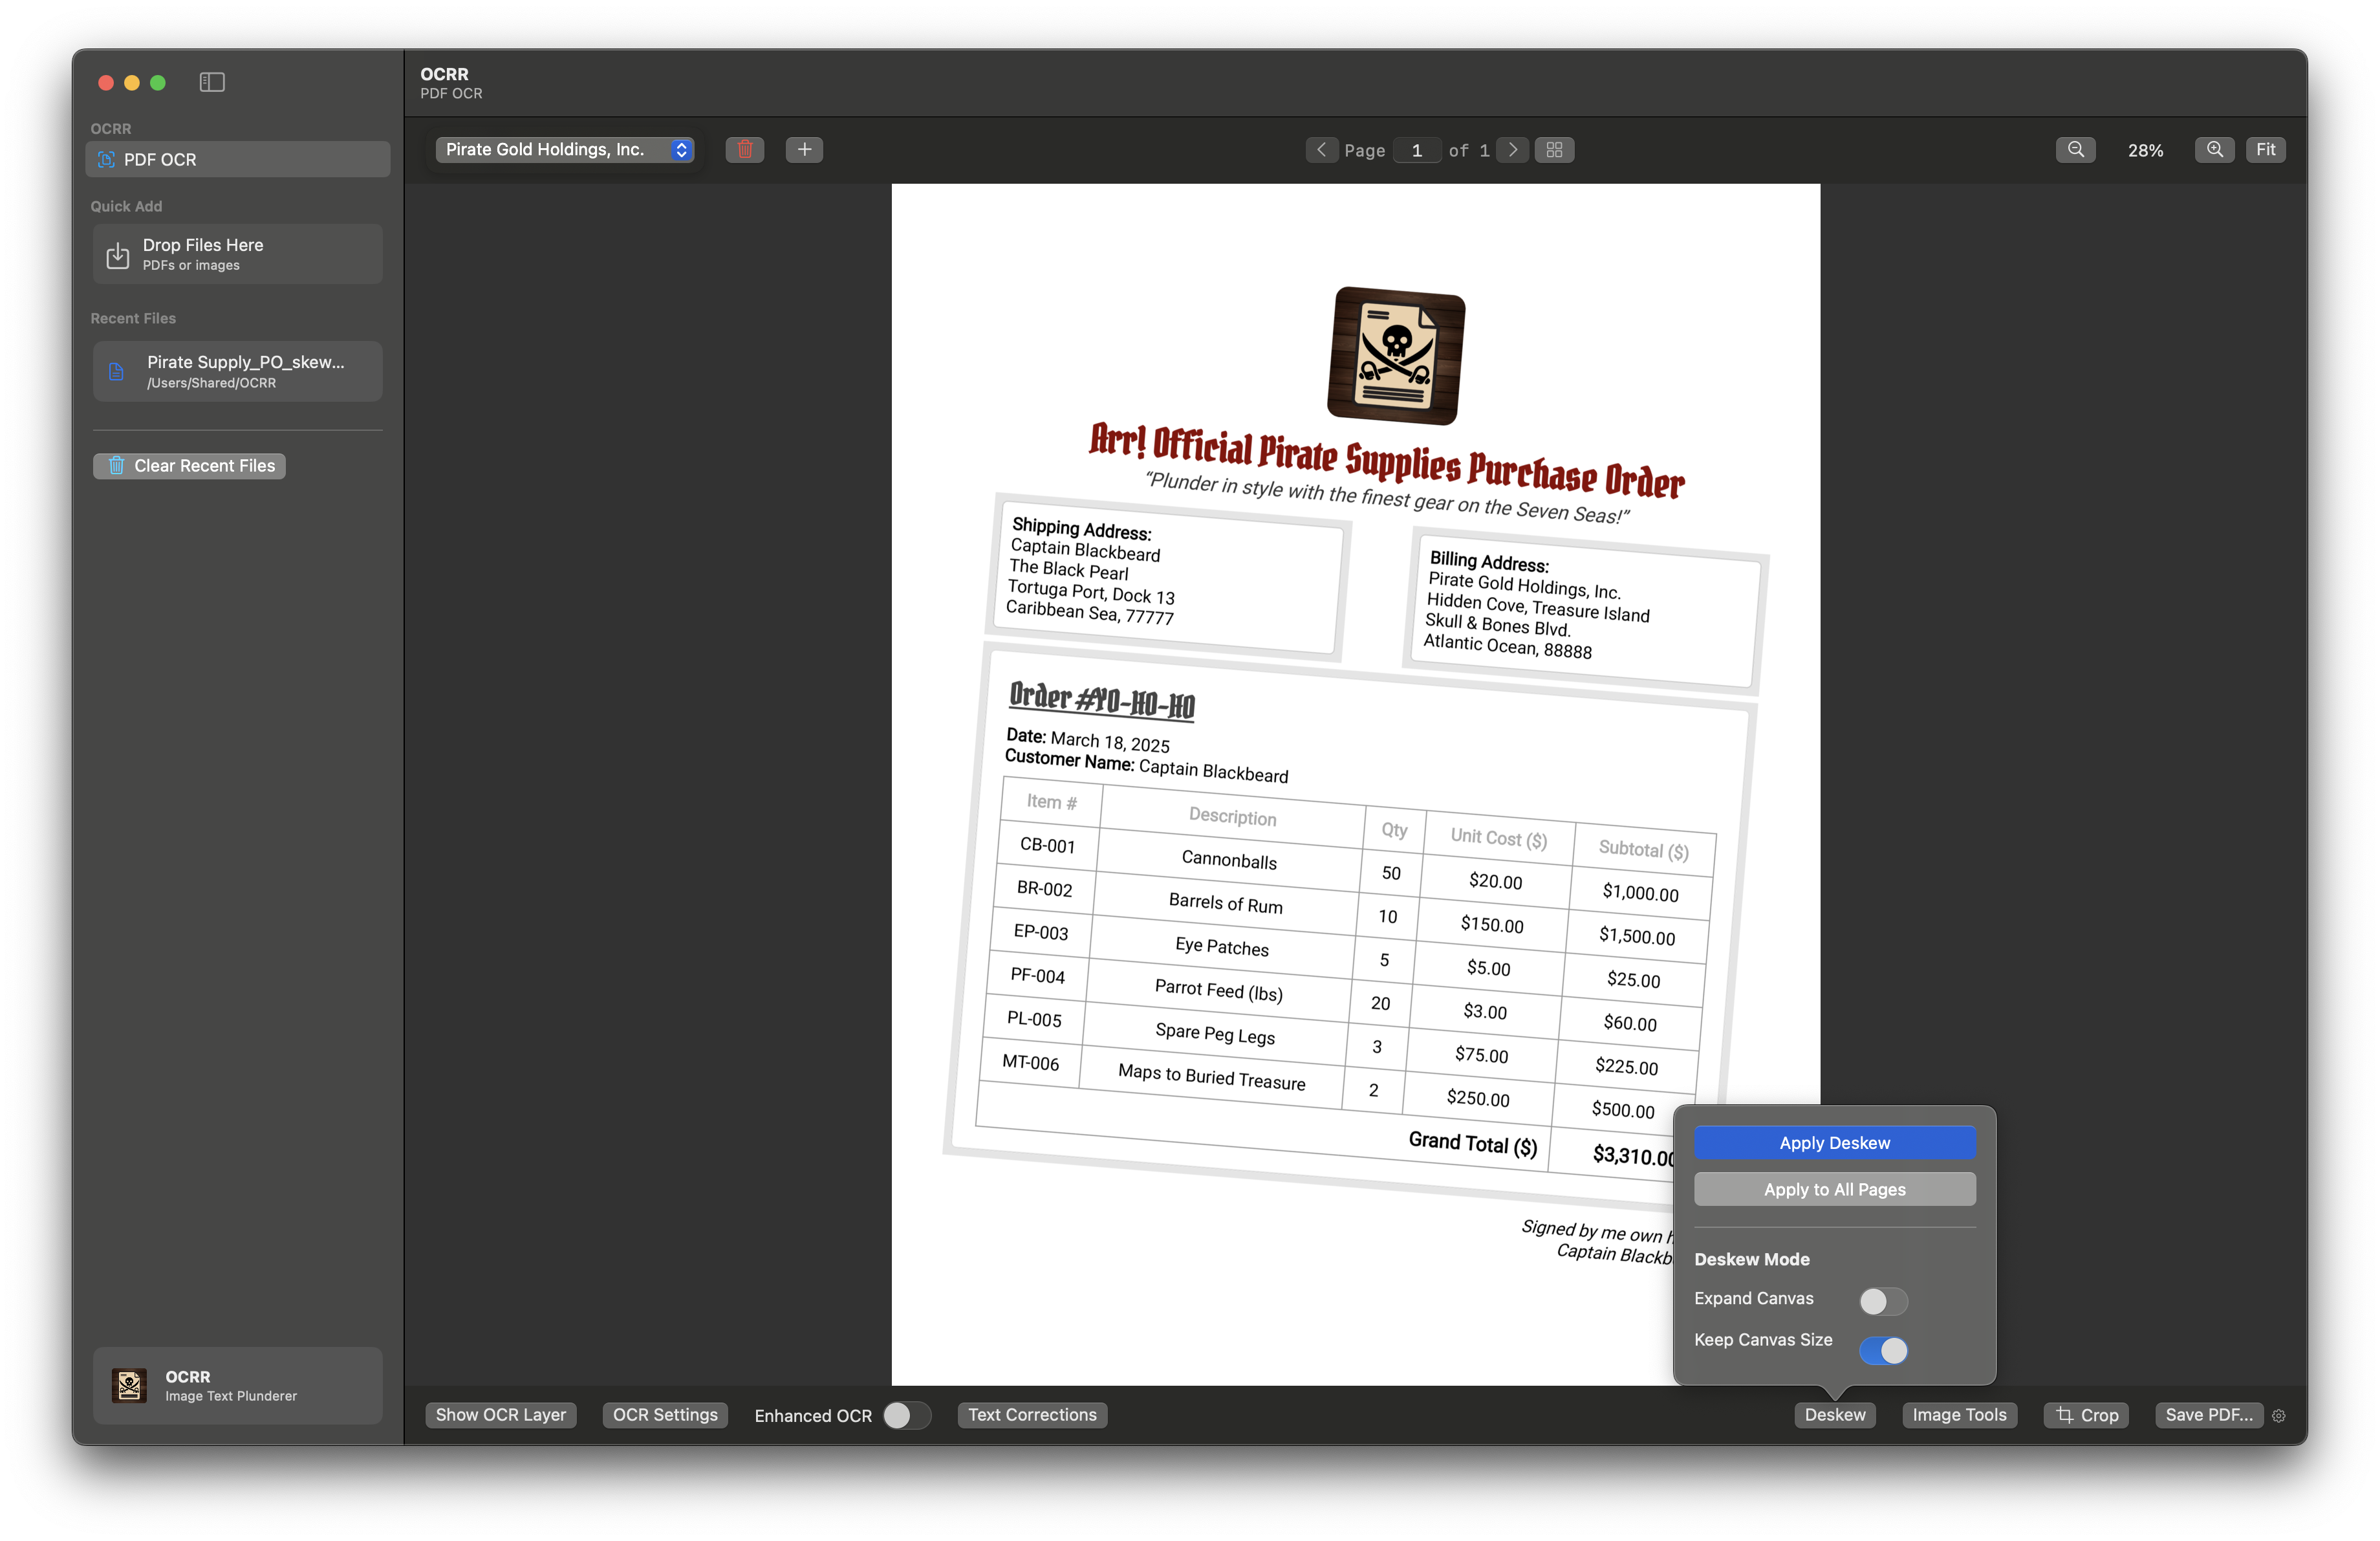 Deskew settings popover showing mode options
Crop Mode
OCRR includes a flexible Crop Mode feature that allows you to crop your document pages before running OCR. Crop Mode helps you focus on the area of interest by removing unwanted borders or backgrounds from scans and photos. This feature is independent of deskew and is useful for preparing your document for optimal OCR results.
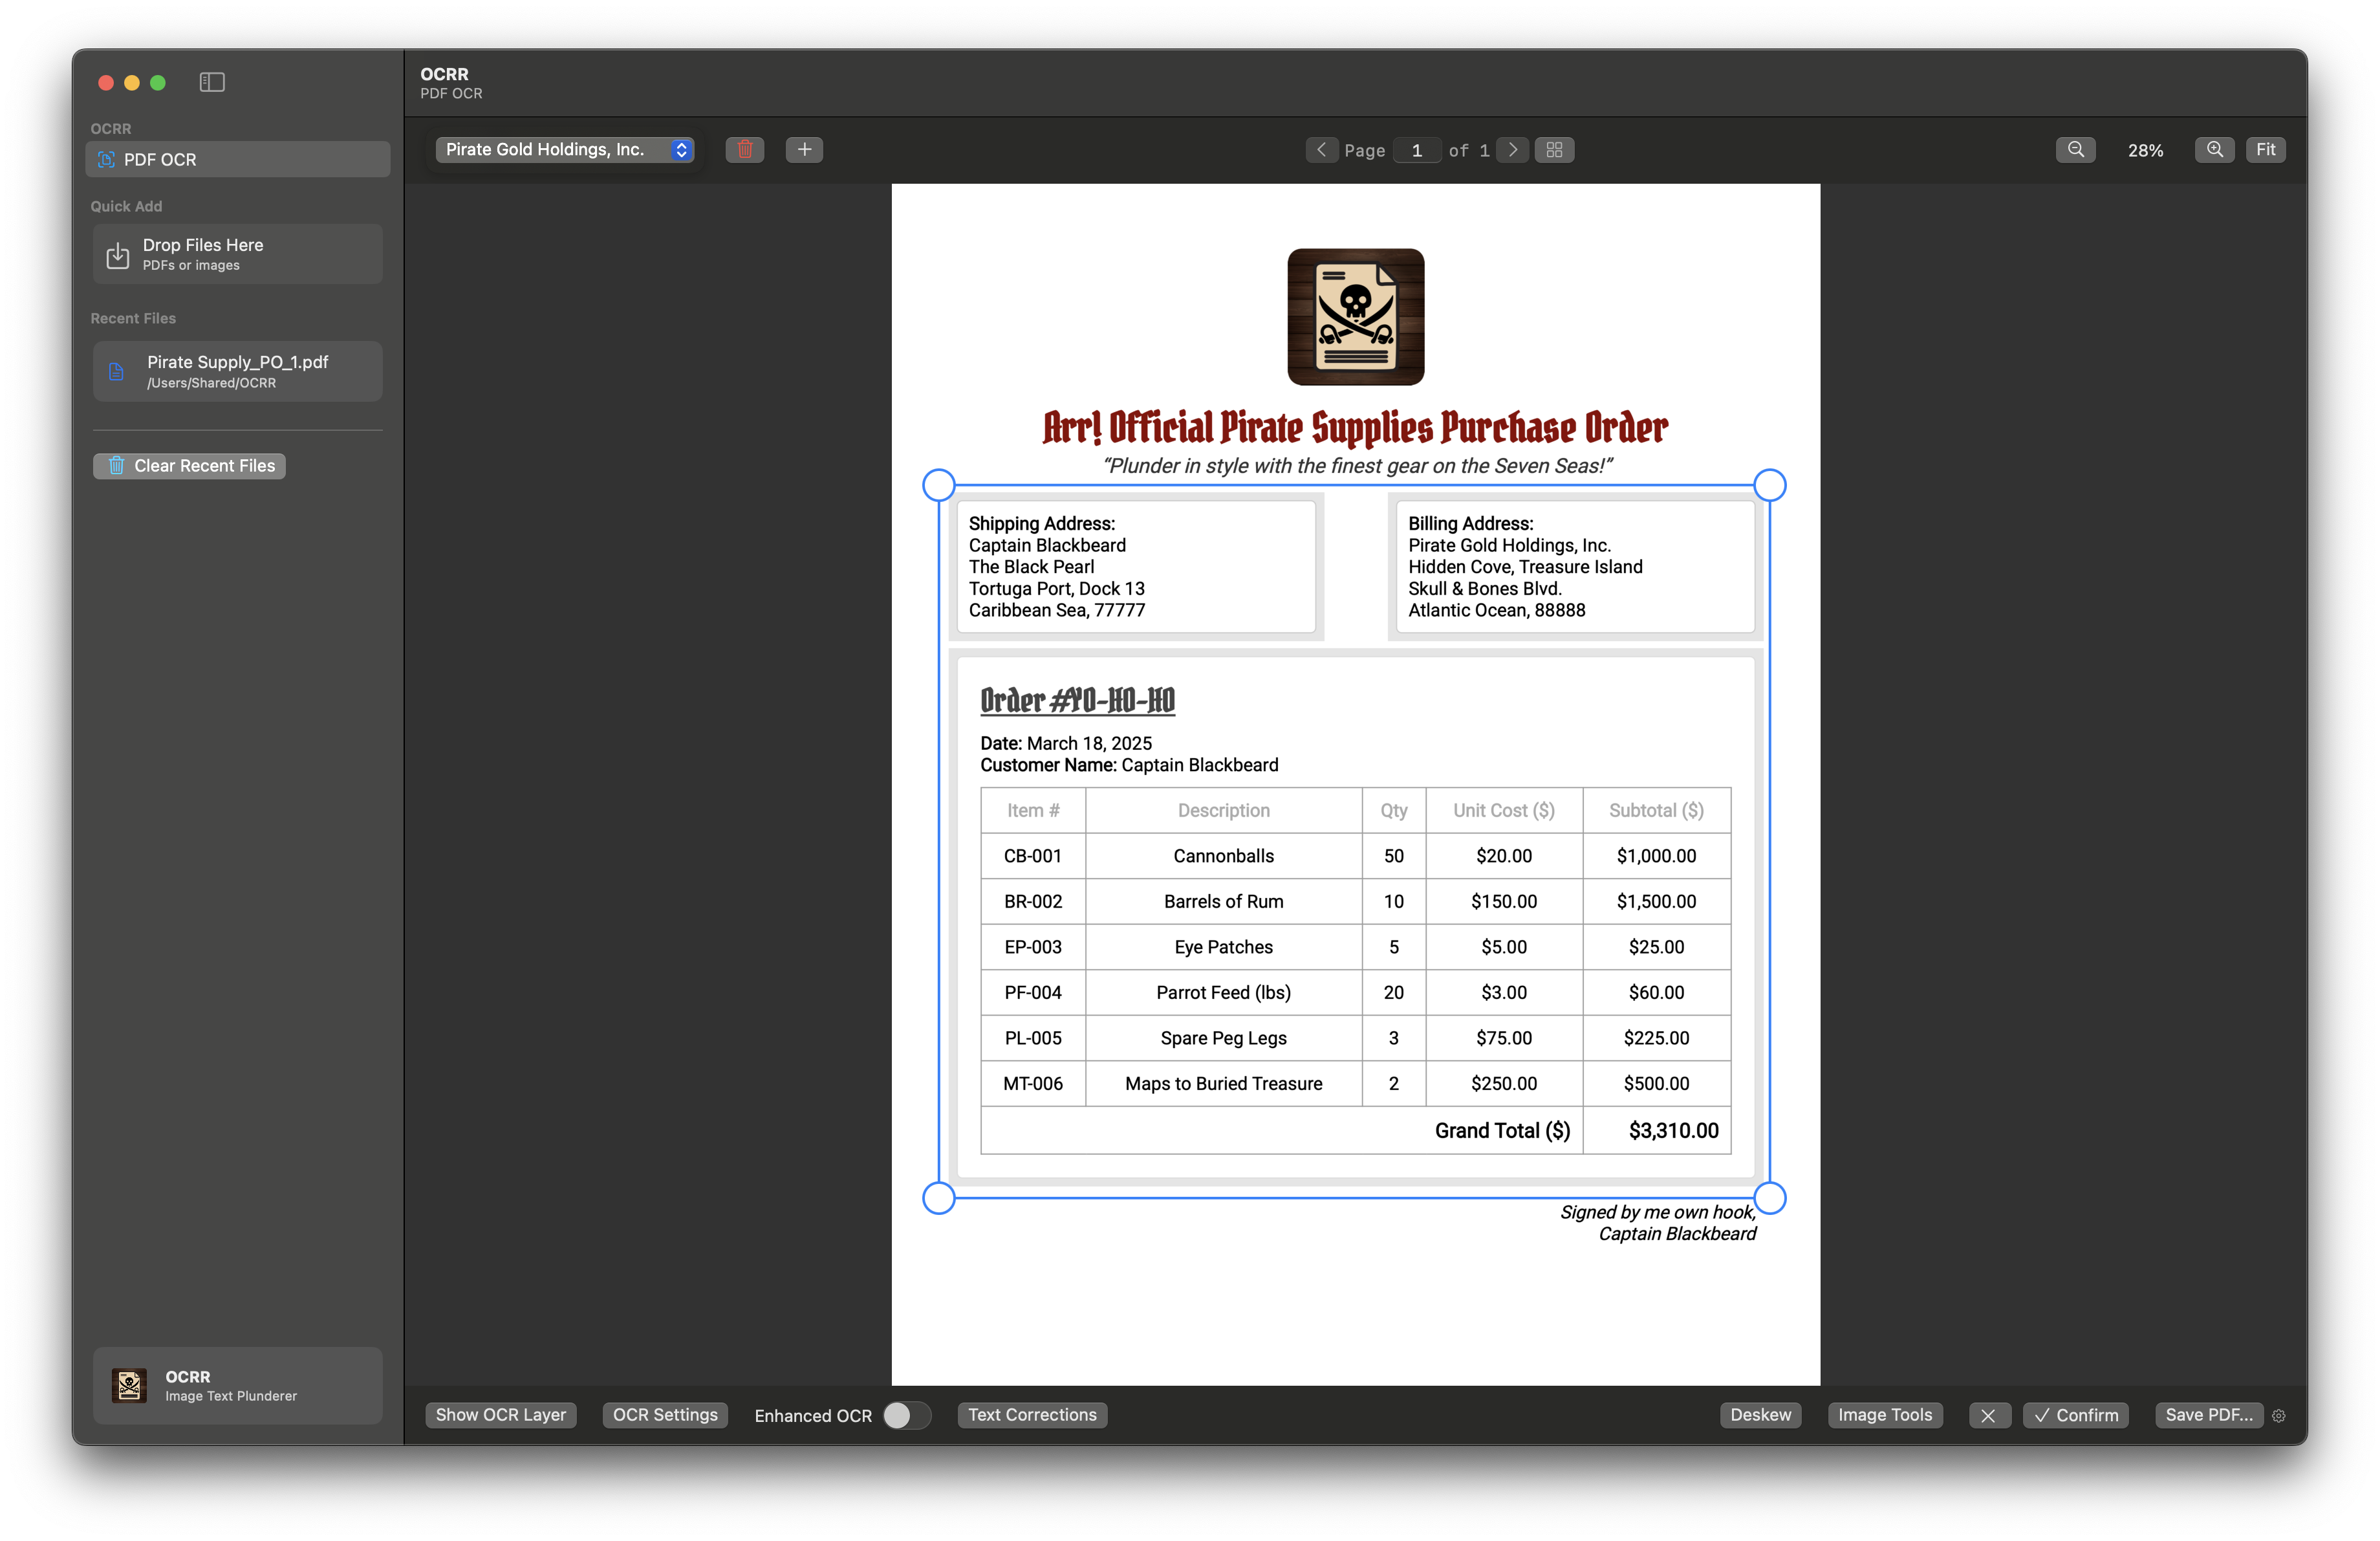 Crop Mode overlay with adjustable corners
How Crop Mode Works
- Edge Detection: When you activate Crop Mode, OCRR uses Apple's Vision framework to automatically detect the edges of the document within the image. The detected region is highlighted as an adjustable quadrilateral overlay.
- Manual Adjustment: You can drag the corners of the overlay to fine-tune the crop region if the automatic detection is not perfect or if you want to crop a custom area.
- Commit Crop: Once satisfied, confirm the crop to apply it. The image will be cropped to the selected region.
Using Crop Mode
- Open your document in OCRR.
- Click the Crop button in the bottom control panel.
- OCRR will highlight the detected document edges. Adjust the corners as needed.
- Click the checkmark button to confirm and crop the image to the selected area.
Note: Cropping a page will clear any existing OCR results for that page. You should crop before running OCR for best results.
Overlay Settings
When viewing the OCR layer, you can customize how the recognized text appears:
- Hide Background: Shows only the recognized text on a white background, hiding the original document.
- Show Boxes: Displays bounding boxes around recognized text blocks, helping you see what has been detected.
Editing Recognized Text
You can correct any errors in the OCR results directly in the application:
- Click on any text block in the OCR overlay to select it.
- Click again to open the text editor for that block.
- Edit the text as needed.
- Click outside the editor or press Enter to apply your changes.
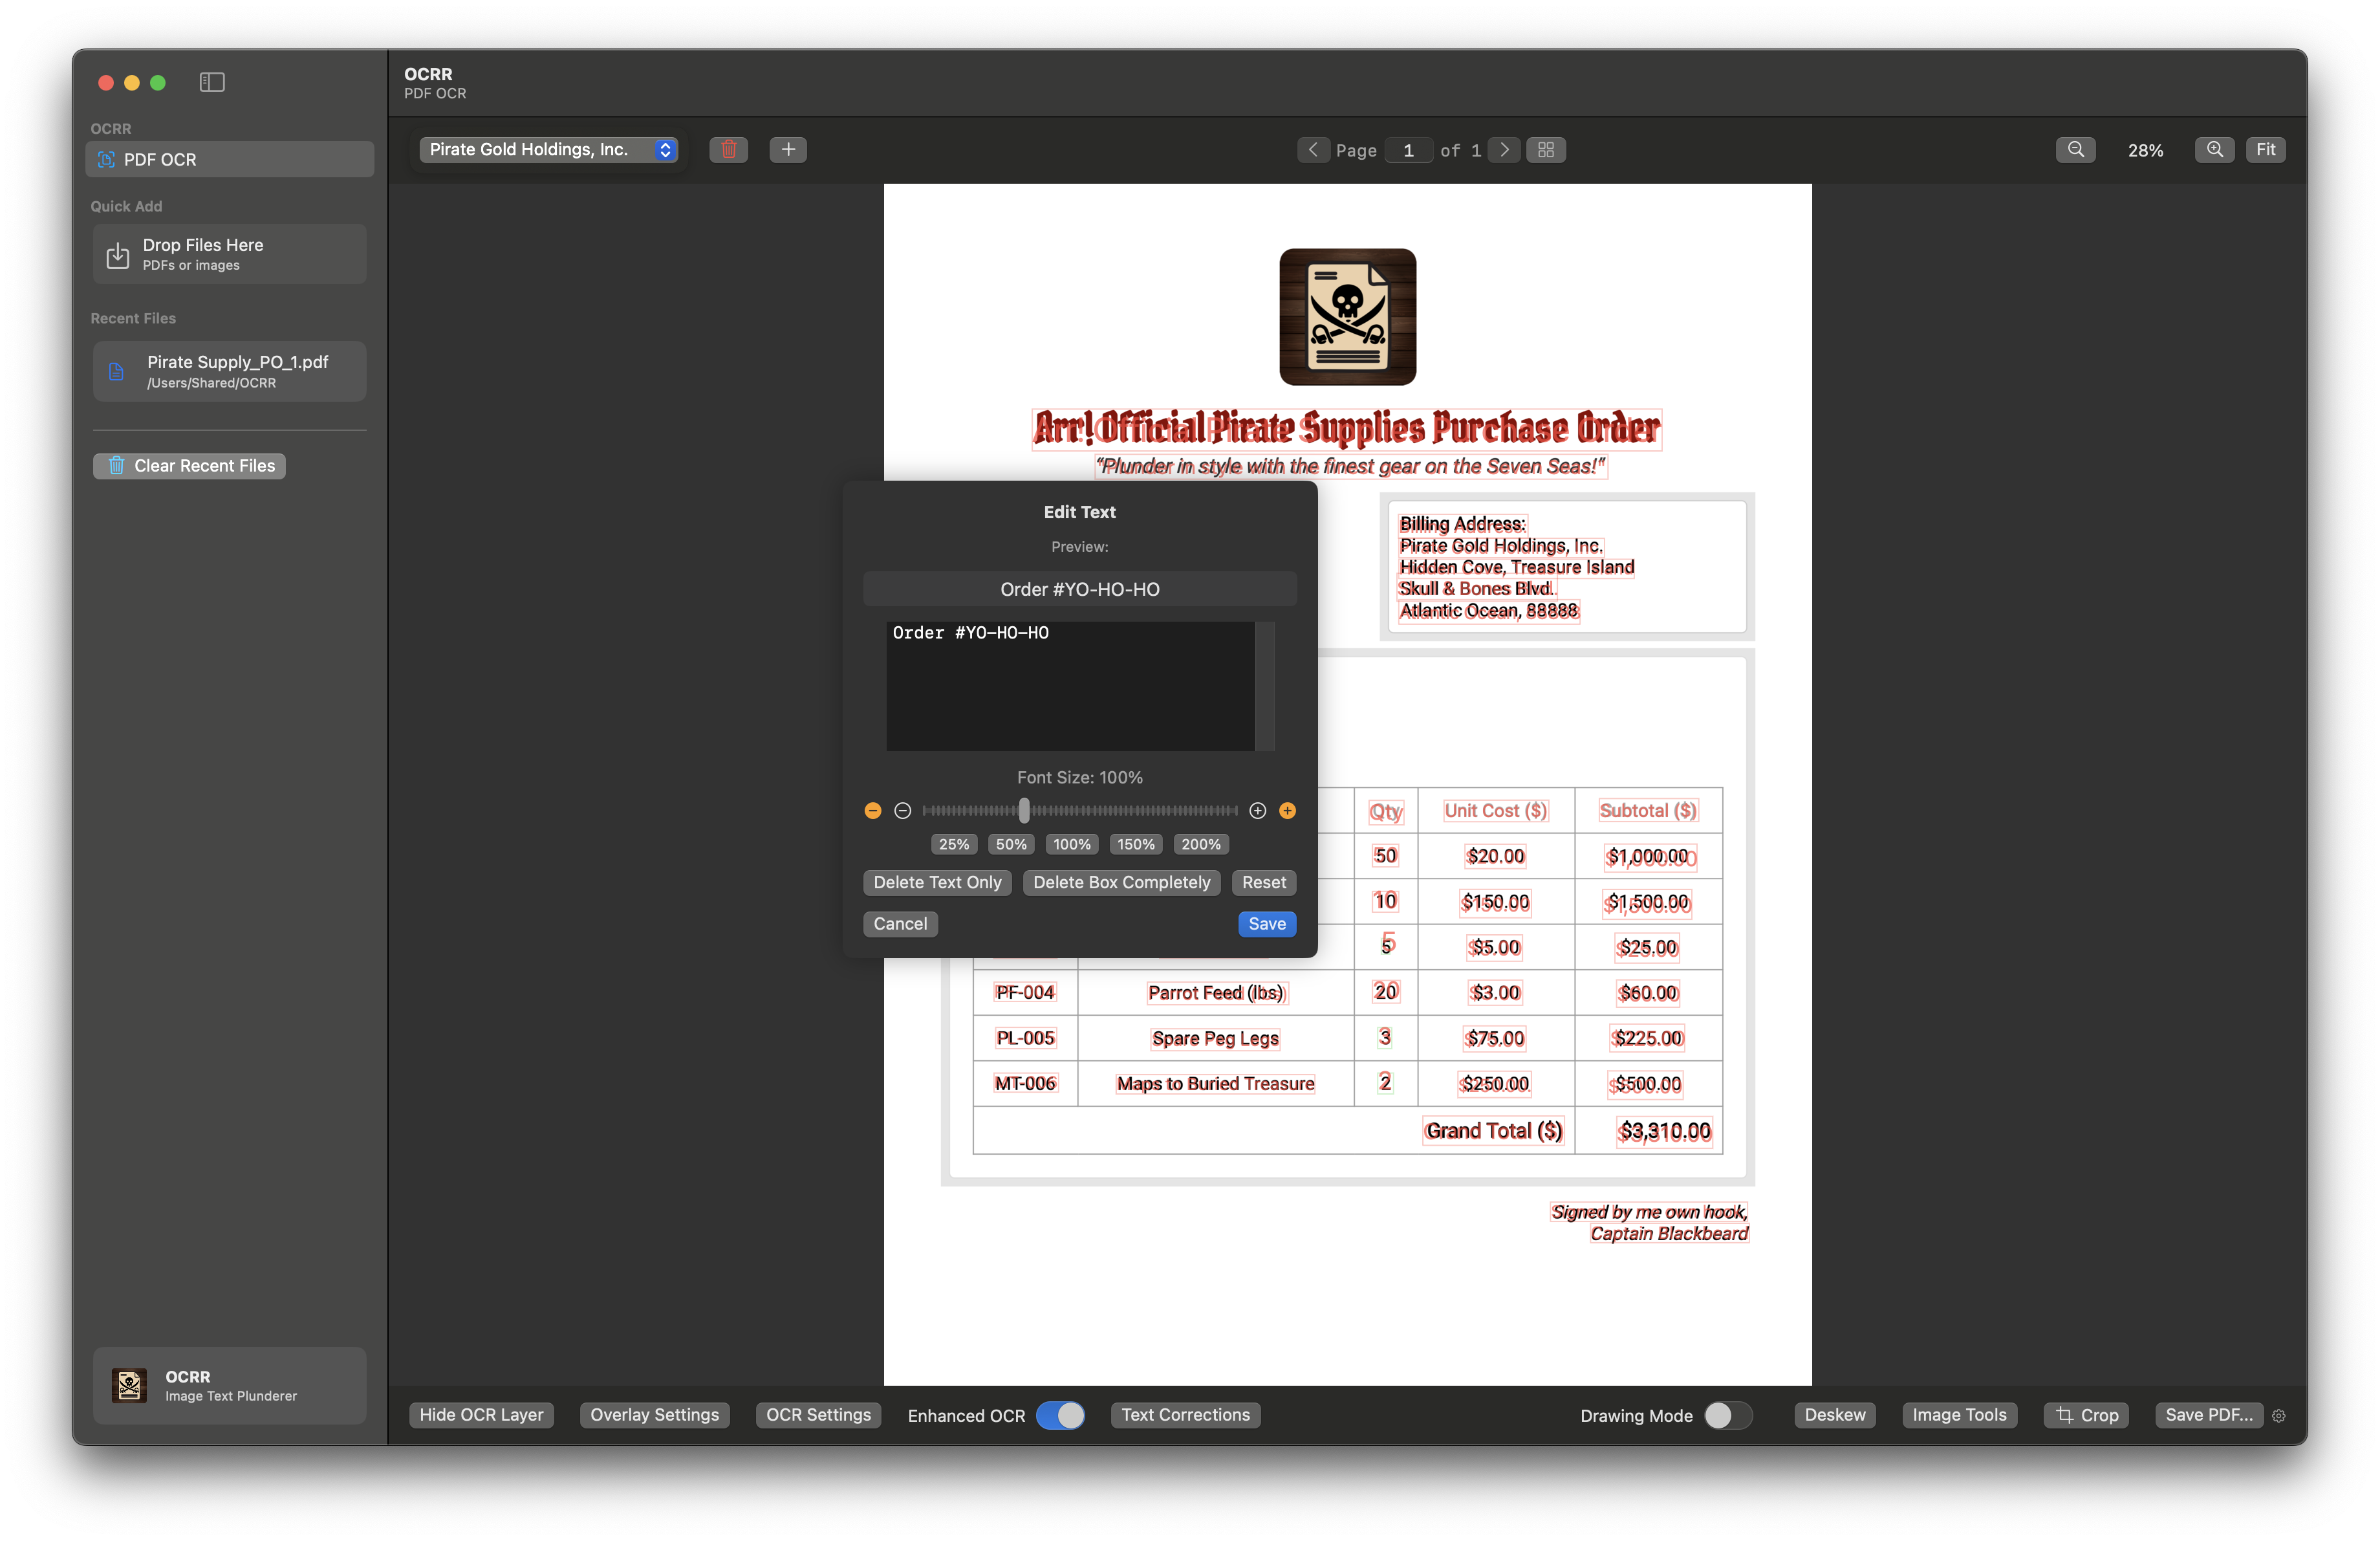 Text editor popup for correcting OCR text
Drawing Mode
If OCRR missed a text area, you can manually add it:
- Toggle on "Drawing Mode" in the bottom control panel.
- Click and drag to draw a rectangle around the text you want to capture.
- A text editor will appear, allowing you to enter the text manually.
- Click outside the editor or press Enter to add the custom text block.
Note: Drawing mode is only available when the OCR layer is shown.
Saving Your Document
After processing and editing your document, you can save it with the OCR layer embedded:
- Click the "Save PDF..." button in the bottom control panel.
- Choose a location to save the file.
- OCRR will create a searchable PDF containing both the original image and the recognized text layer.
Understanding Domains
In OCRR, a "domain" is a context-specific collection of words, terms, and correction rules. For example, you might create domains for organization specific:
- Business Documents
- Legal documents
- Technical manuals
- Financial reports
Each domain has its own word list, correction rules, and OCR settings, making OCR more accurate for documents in that specific field. This domain-specific approach allows you to optimize OCRR for different types of documents you work with regularly.
Creating a New Domain
- Open any document in OCRR.
- Click the domain dropdown in the top-left corner of the OCR pane or Batch Processing view.
- Click "Create New Domain..."
- Enter a name for your domain (e.g., "Company XYZ Invoices").
- Click "Create" to add the new domain.
Note: Domains are stored in OCRR's database and will be available in future sessions.
Domain-Specific Features
The following features in OCRR can be customized for each domain:
- Word Lists: Custom dictionaries of specialized terminology
- Text Correction Rules: Rules to fix common OCR errors specific to your domain
- OCR Settings: Recognition parameters optimized for your document types
- Image Correction Save a template image with selected unique features for automatic image correction
Domain-Specific OCR Settings
Each domain can have its own OCR settings, allowing you to optimize processing for different types of documents:
- Select a domain from the dropdown.
- Open OCR Settings.
- Enable "Domain-specific" at the top of the settings dialog.
- Configure the settings as needed for this domain.
- Click "Done" to save.
The next time you select this domain, OCRR will automatically use these specific settings rather than the global defaults.
You'll learn more about each of these features in their respective sections of this help guide.
Navigation
- Previous: Getting Started
- Next: Image Corrections